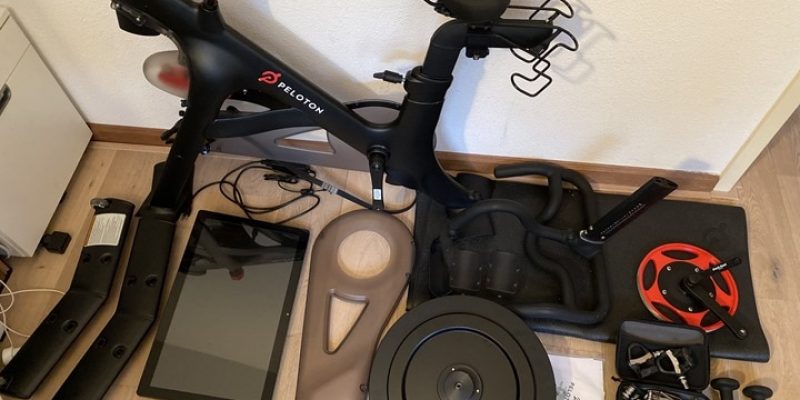
Moving fitness equipment requires careful planning, especially for high-end machines like Peloton bikes. Many homeowners choose to hire professional moverswho specialize in handling exercise equipment during relocation, but with some guidance, you can tackle this project yourself. This guide walks you through the step-by-step process of safely disassembling your Peloton bike for transportation. From gathering the right tools to properly packaging each component, following these instructions will help ensure your investment arrives intact and ready for reassembly in your new space.
Tools Required for Disassembly
To disassemble a Peloton Bike efficiently, gather these tools before starting the process. You’ll need a set of metric Allen wrenches for removing various bolts and screws throughout the bike. A pedal wrench is essential for safely detaching the pedals without damaging the threads. Keep adjustable pliers handy for gripping and turning tight components that may resist removal. A clean microfiber cloth will help you wipe down parts as you work. For later reassembly, a torque wrench ensures proper tightening of critical components. Finally, prepare a small container or labeled ziplock bags to organize and store small hardware pieces. Having everything ready beforehand will make the disassembly process smoother and more efficient.
Disconnecting and Removing Components
Start by carefully disconnecting and removing the various components of the Peloton Bike. First, unplug the power adapter and remove any attached cables. Next, use your metric Allen wrench to loosen and remove the pedals by turning the right pedal counterclockwise and the left pedal clockwise (opposite of standard threading). Then, detach the seat by loosening the adjustment knob and sliding it out of the seat tube. Remove the water bottle holders by unscrewing them from the frame. Next, disconnect the resistance knob by loosening the set screw and sliding it off. Finally, remove the front and rear stabilizers by unscrewing the bolts securing them to the frame. Following these steps carefully will set you up for successful disassembly.
Detaching the Screen and Handlebars
To detach the screen and handlebars safely, begin with the bike unplugged from any power source. Locate the screws securing the screen to the handlebars and, using the appropriate screwdriver, carefully remove them while supporting the screen to prevent drops. Gently disconnect any cables linking the screen to the bike, taking care not to pull or damage the wires. Once the screen is free, set it aside in a safe place. For the handlebars, find the bolts holding them to the frame. Using the correct size Allen wrench, loosen these bolts completely and carefully lift the handlebars away from the bike’s frame. Store both components securely, preferably in their original packaging if available, to protect them during transport.
Removing the Pedals and Seat
Disengage the pedals and seat from your Peloton Bike by following these specific steps. Begin with the pedals, using an Allen wrench to remove them. Remember the right pedal loosens clockwise while the left pedal loosens counterclockwise—opposite of standard threading. Once the pedals are removed, locate the seat adjustment knob beneath the seat and rotate it counterclockwise until loose enough to slide the seat out of position. Store all hardware in a labeled container for easy retrieval during reassembly. To fully remove the seat, you’ll need to loosen the seat post clamp as well. With these components detached, you’re ready to continue with the remaining disassembly steps.
Packaging and Transporting the Disassembled Parts
Properly package each disassembled component of your Peloton Bike to ensure safe transport. Wrap delicate parts like the screen and console in bubble wrap or packing paper, securing with tape to prevent unwrapping during movement. Place screws, bolts, and small hardware pieces in labeled ziplock bags, indicating which component they belong to. Protect the frame and larger metal parts with furniture blankets or moving pads, securing them with stretch wrap to prevent scratches. For the touchscreen, add extra cushioning and mark the box as “Fragile.” Pack components in appropriately sized boxes, filling empty spaces with packing material to prevent shifting. Label each box clearly with contents and handling instructions to simplify the reassembly process at your destination.
Related Topics:

